
Paracord bracelets, often called survival bracelets, are functional and stylish accessories. They serve a practical purpose for outdoor enthusiasts and can also be a great DIY gift idea. These bracelets are made from strong and durable paracord, making them perfect for various situations.
Paracord Bracelet Functionality
Paracord bracelets are more than just fashionable items; they are incredibly useful tools, especially for outdoor activities and survival scenarios. The inherent strength and durability of paracord make these bracelets ideal for a variety of purposes. When unraveled, the paracord can be used for creating shelters, securing equipment, or even as a makeshift fishing line. The inner strands of the cord can serve as sewing thread or as a snare. This versatility ensures that a paracord bracelet is a practical item to have on hand. Its compact wearable nature means that you always have a length of strong rope with you when you need it. This functionality is why they are often referred to as survival bracelets, demonstrating their utility in real-world situations.
Essential Materials for Paracord Bracelets
Creating paracord bracelets requires a few key materials, including 550 paracord, a buckle, scissors, a lighter, and a tape measure or ruler to ensure correct sizing. These are the basic tools needed.
Paracord Type and Length
The standard choice for most paracord bracelets is 550 paracord, known for its strength and durability. It’s essential to determine the correct length of paracord needed for your bracelet. A general guideline suggests using about 1 foot of paracord for every 1 inch of bracelet length. For example, a 7-inch bracelet would typically require around 7 feet of paracord. However, this can vary depending on the specific weave or pattern you choose. It’s always good to have a little extra to account for knotting and finishing. Different designs might call for slightly more or less cord, so check your specific pattern instructions.
Buckle Selection
Choosing the right buckle is crucial for both the functionality and aesthetics of your paracord bracelet. A common size for paracord bracelets is a 3/8 inch buckle, however, you can use other sizes and styles according to your preference. Buckles come in various materials like plastic and metal, each offering different levels of durability. Some buckles also incorporate additional features such as LED lights, compasses, fire starters, and whistles, which are beneficial for survival bracelets. Consider the buckle’s size and how it complements your chosen paracord color and pattern. The buckle should securely fasten the bracelet, ensuring it stays on your wrist.

Basic Paracord Bracelet Techniques
Mastering basic techniques is essential for crafting paracord bracelets. The cobra weave is a fundamental pattern for beginners. Measuring your wrist correctly ensures a comfortable fit for your bracelet.
Cobra Weave Instructions
The cobra weave is a popular and relatively simple technique for creating paracord bracelets. Begin by threading the paracord through one end of a buckle and then through the other. Create a loop on one side and pull the ends through to secure it to the buckle. Next, make a figure four shape with the left cord over the middle two cords. Then, place the right cord over the figure four cord and slide the right cord under, tightening the knot. Continue alternating sides to create the cobra pattern until the desired length is achieved, ensuring a consistent weave.
Measuring for Correct Fit
Accurate measurement is crucial for a comfortable and well-fitting paracord bracelet. To begin, use a flexible measuring tape or a piece of string to measure your wrist. Wrap it snugly around the wrist where the bracelet will sit. Add about one inch to this measurement to account for the thickness of the paracord and the buckle. This will give you the total length needed for your bracelet. It is important to note that the amount of paracord needed will vary depending on the type of weave. It is also necessary to make adjustments based on the buckle size you are using.

Advanced Paracord Bracelet Designs
Beyond the basic cobra weave, many advanced paracord bracelet designs exist. These include variations and patterns that offer unique looks and increased functionality. Explore various knot styles and techniques for a more complex project.
Variations and Patterns
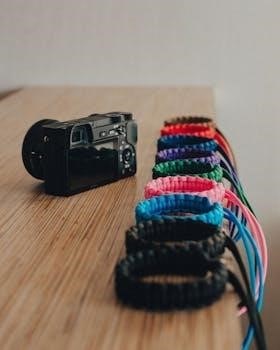
Many variations and patterns are available for paracord bracelets, moving beyond the basic cobra weave; These include designs like the fishtail, king cobra, and other intricate knots. Each variation offers a unique look and can increase the bracelet’s functionality. Some patterns may incorporate different colors or multiple strands of paracord for a more complex aesthetic. Exploring these patterns allows for customization and the creation of personalized bracelets. There are also many printable pdf tutorials available that provide step-by-step instructions for these more advanced designs. Experimenting with different patterns can lead to the discovery of new favorites, and help to expand your paracord crafting skills.

Paracord Bracelet PDF Resources
Numerous PDF resources are available for paracord bracelet making. These include downloadable tutorials and printable instructions, making it easy to learn new patterns and techniques. Many provide step-by-step guidance.
Downloadable Tutorials
There are many downloadable tutorials available online that cater to all skill levels, from beginner to advanced. These tutorials often come in PDF format, making them easy to save and access on various devices. They provide clear, step-by-step instructions, often accompanied by photos or illustrations, which makes learning new paracord bracelet patterns much easier. Many websites offer free PDF downloads for a variety of designs, including the basic cobra weave and more complex patterns. Some tutorials also include information on essential materials, measuring techniques, and finishing touches, making them a complete guide for bracelet making enthusiasts.
Printable Instructions
Printable instructions are a valuable resource for crafting paracord bracelets, offering a tangible guide that can be kept at your workspace. These instructions, often available in PDF format, allow you to easily follow along without needing a digital device. Many online resources offer printable versions of their paracord bracelet tutorials, featuring clear diagrams and written steps. These printouts can be particularly helpful for beginners, providing a visual reference that can be marked up or annotated as needed. Having printable instructions also enables you to work offline and share patterns with others who enjoy paracord crafting.
Tips for Successful Paracord Bracelet Making
To ensure your paracord bracelet is a success, it’s wise to pre-shrink the cord to avoid size changes, and always finish the ends neatly with a lighter to prevent fraying.
Pre-Shrinking Paracord
Before embarking on your paracord bracelet project, pre-shrinking the paracord is a crucial step. This process involves submerging the cord in hot water to cause it to contract slightly. To accomplish this, gather a 6-quart saucepan, a gallon of water, a stove top, and tongs. Heat the water until it’s boiling, then carefully immerse the paracord. Allow it to soak for a few minutes, then remove it with tongs and let it air dry. Pre-shrinking prevents your finished bracelet from becoming too loose after washing or getting wet, ensuring a consistent fit. This step is vital for any bracelet project.
Finishing Touches
Once your paracord bracelet is woven, the final touches are crucial for a polished look. Begin by carefully cutting the excess cord ends about 1/4 inch from the bracelet. Use a lighter to gently melt the cut ends, preventing them from fraying. Be cautious not to burn the bracelet itself. Press the melted ends against the bracelet to secure them. This process ensures a clean, finished appearance, and helps to maintain the integrity of your bracelet over time. These small details significantly enhance the overall look and durability of your handcrafted paracord accessory.